Feeds:
Posts
Comments

Posts Tagged ‘comfort food’

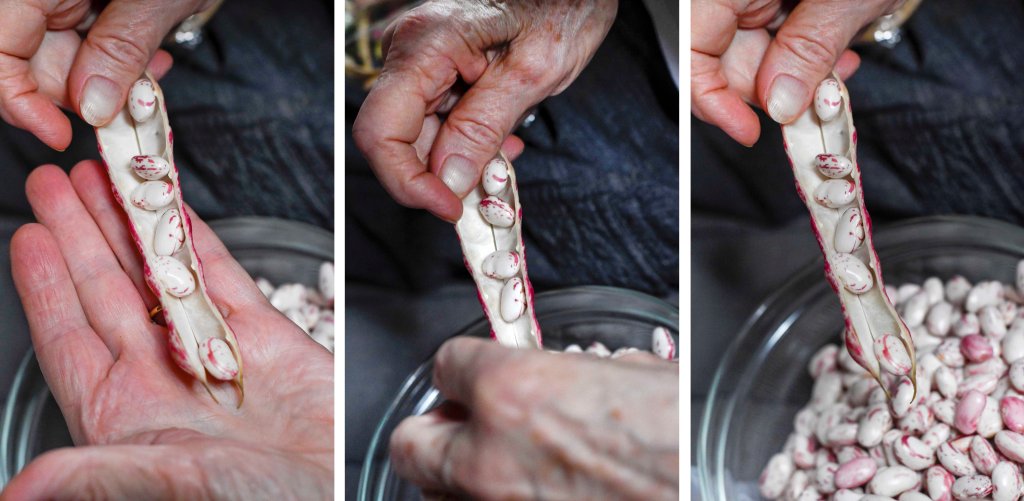
This recipe takes quite a bit of prep work as you neatly dice all the vegetables but the end result is well-worth the effort.  It is one of my favorite soups to make when fresh cannellini beans come to the green market.  This usually happens in the late summer or early fall.  I particularly enjoy the zen of sitting and shelling the beans.  If you have a rind of Parmesan cheese on hand, throw it in the pot.  It will add a lovely richness to the broth.

A version of this recipe will be found in my new book, The Mighty Bean, which will be published in February 2021.

Serves 6

¼ cup unsalted butter

2 tablespoons olive oil

1 cup diced onions

1 cup diced leeks

2 tablespoons minced flat leaf parsley

2 cups fresh cannellini beans

6 cups low-sodium vegetable broth

1 cup diced potatoes

1 cup diced carrots

1 cup diced celery

1 cup diced zucchini or yellow summer squash

1 cup diced green beans or yellow wax beans

1 cup fresh peas

1 cup chopped Savoy cabbage

2 cups diced Italian plum tomatoes with their juice

Salt and pepper

Extra virgin olive oil for serving, optional

Freshly grated Parmesan cheese for serving, optional

Combine butter and oil in a large soup pot over medium heat.  When hot, add the onions, leeks and parsley.  Lower the heat and cook, stirring frequently, for about 5 minutes or just until the aromatics begin to soften.

Stir in the cannellini beans and add 2 cups of the broth.  Cook for an additional 15 minutes.

Begin adding all the vegetables except the tomatoes, one at a time, and cooking each one for 3 minutes before adding the next one.  They should be added as they are listed in the ingredient list as this allows for the proper cooking time for each one.  

When all the vegetables have been added, stir in the tomatoes and remaining vegetable broth.  Season with salt and pepper, raise the heat and bring to a boil.

Immediately lower the heat to a bare simmer.  Simmer for about 30 minutes or until the soup is very thick.

Remove from the heat and serve with a sprinkle of grated Parmesan cheese and a drizzle of extra virgin olive oil, if desired.


Read Full Post »

blog_PotPie_IMG_7327

My mother made extraordinary pastry as did my father’s sister, Mary Frances.  Their skill intimidated me and, until I decided to make pot pies commercially, I never made pastry, I would always ask mom to make it for me.  So, when I decided to open my pie shop MOM in the 1970s, I had to spend many, many hours carefully watching her make her famous pastry.  She worked with me and my dear friend, Hu Pope, who would be making the pastry daily in the bakery, torturing us with her skill and our ineptitude.  Of course, the fact that she never measured anything and kept telling us that it was all in the feel didn’t help either.  We eventually got it, but I still believe that it was mainly the use of a big Hobart mixer and a commercial pie shell press which kept our hot hands from touching the dough that gave our acclaimed pastry the same flaky texture of her homemade dough.  However, the years in the bakery eliminated all intimidation and I began fearlessly tackling pastry making.  I usually do a fine job but I still miss my mom’s touch.  Since I made chicken pies every day for 10 years, I now generally leave their preparation to the kids, except for those chilly days when I miss my mom.

When I was a child, chicken pie was often made from leftover roast chicken and gravy.  It is one of those homey dishes that can be made in almost any way – the chicken can be dark and white meat, all white meat, chopped, shredded, cubed, or turkey; the vegetables can be cubed, diced, sliced (Chris’ method,) chunked; mushrooms added.  You get the picture.  This recipe is the basic – it’s up to you to make it your own.

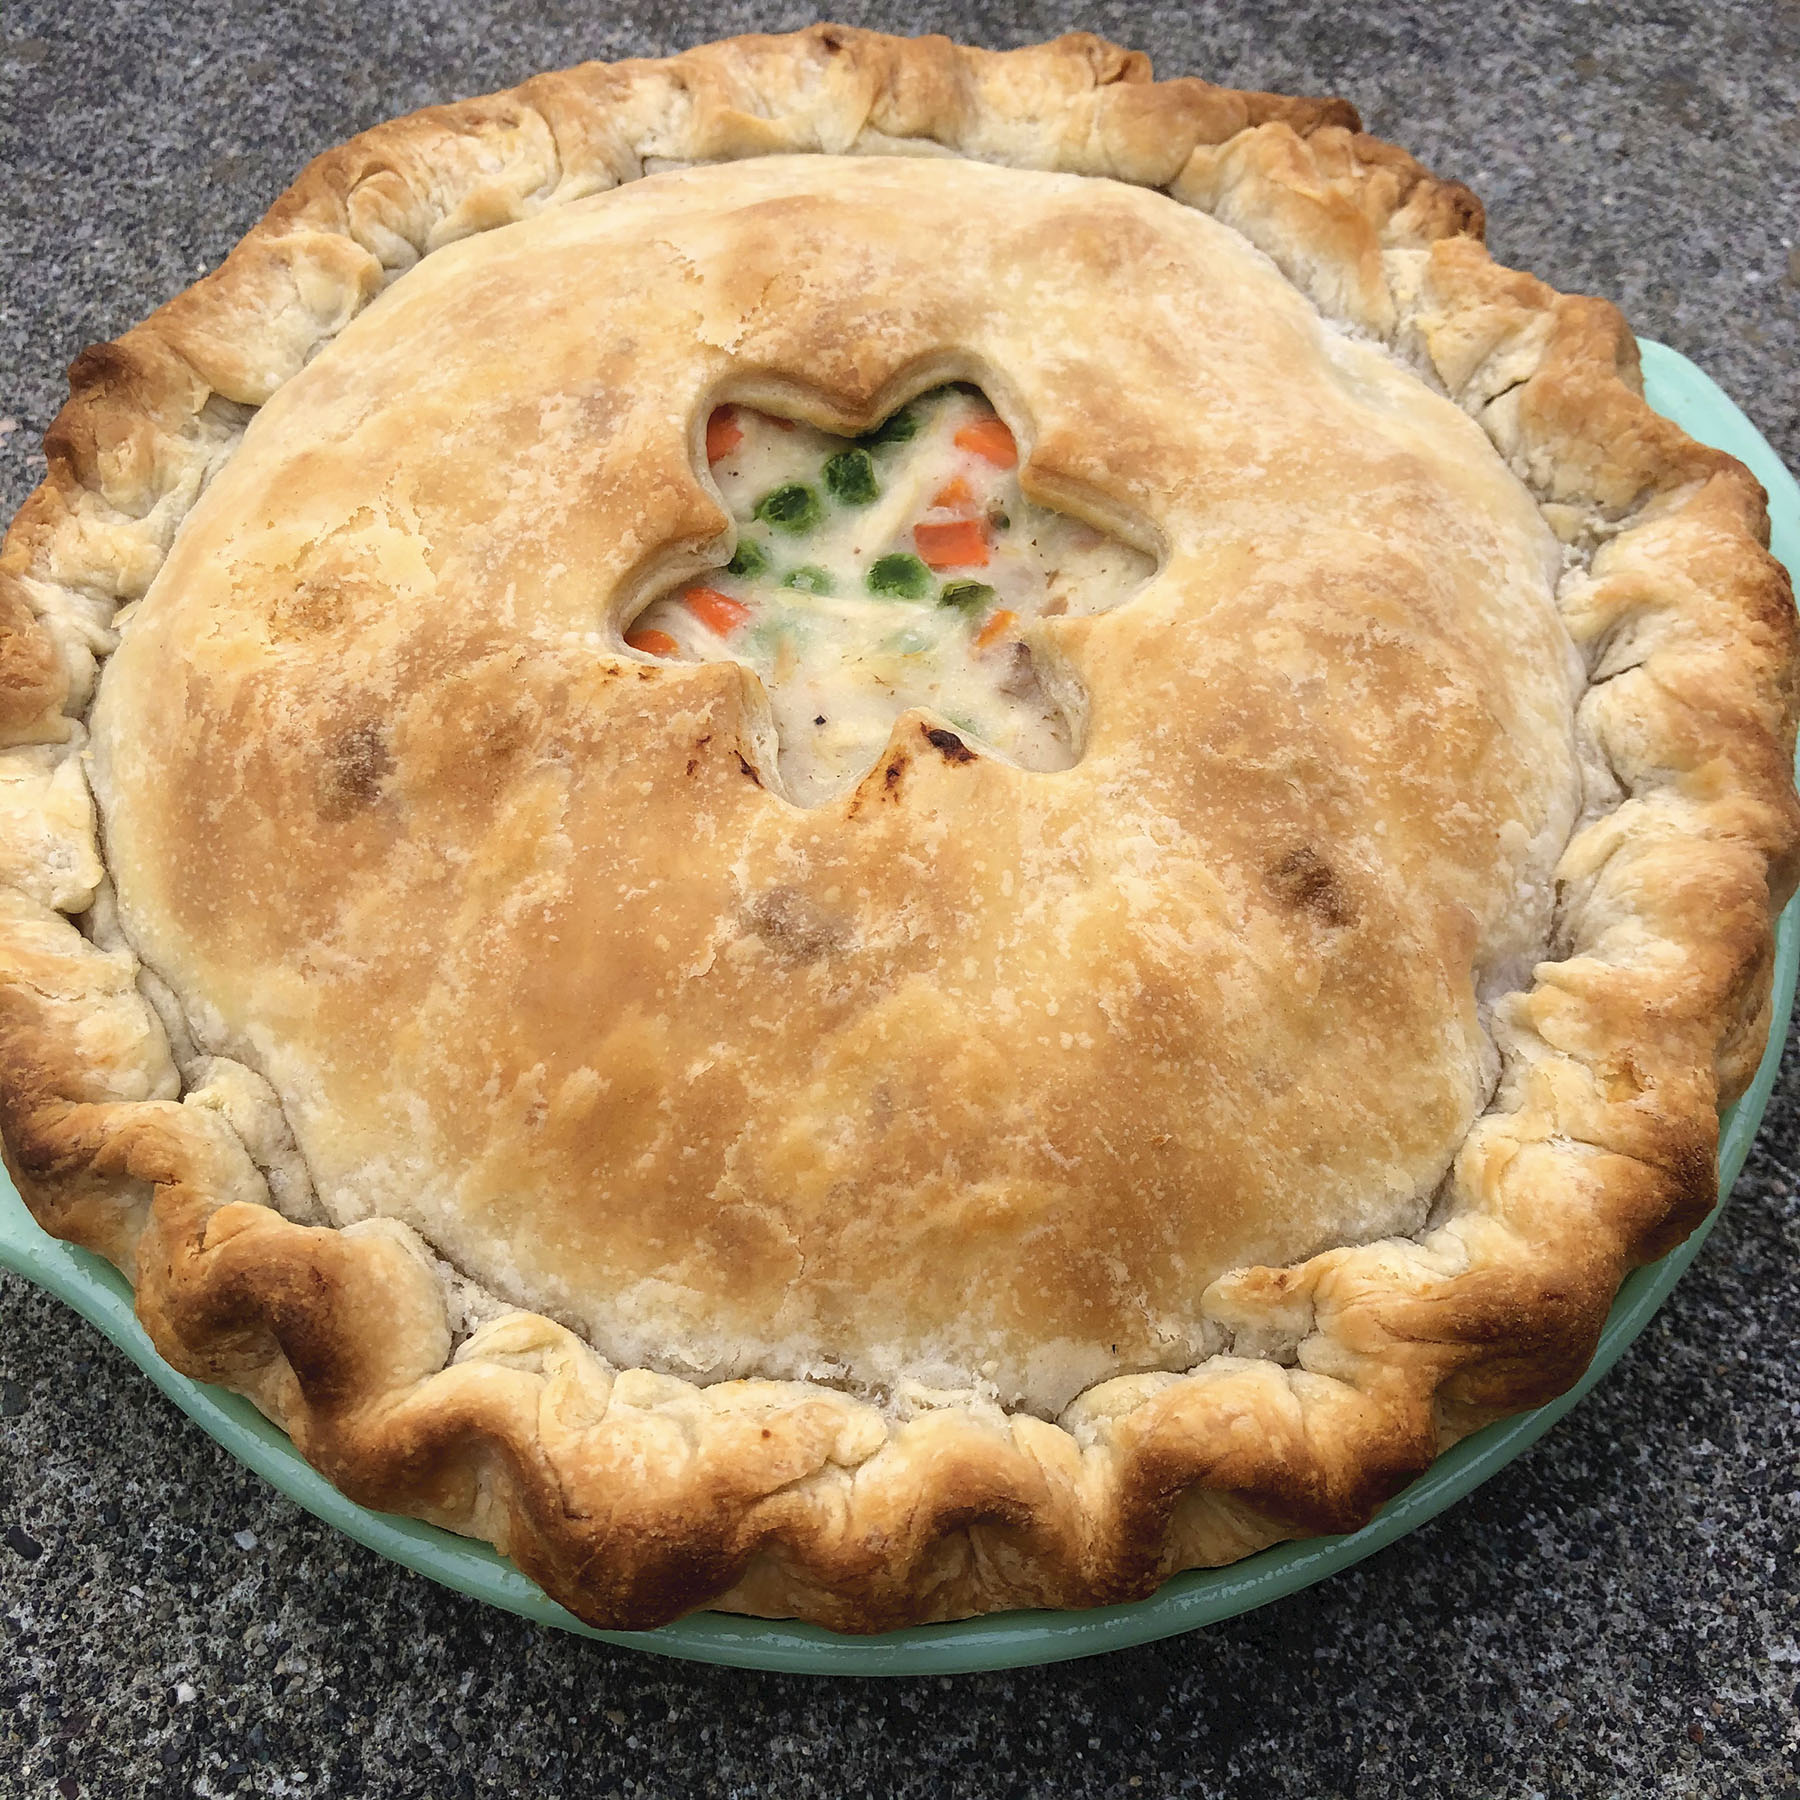
I share photos of my individual chicken pie.  I usually make these as an introduction to people dining with us for the first time.  I think they are homey, delicious, warming and do all the things you want to do to bring people to your table.  I also share a recent photo of one of Chris’s West Coast famous chicken pot pies.  How proud my mom would be of him.

blog_PotPie_IMG_7303


Serves 6 to 8

One 4 pound chicken, rinsed and cut into pieces (or 2 pounds boneless,

skinless chicken breasts cooked in about 3 cups canned, fat-free, low-

sodium chicken broth)

Coarse salt and freshly ground pepper to taste

Nana’s Flaky Pie Crust (recipe follows)

4 organic carrots, well-washed, trimmed, and cubed

3 medium organic potatoes, well-washed and cubed

1 organic onion, peeled and diced

1 cup frozen petit peas, thawed

2½ tablespoons chicken fat or butter

2½ tablespoons sifted all-purpose flour

Place the chicken in a heavy saucepan, cover with cold water, and season with salt and pepper to taste.  Place over high heat and bring to a boil.  Lower the heat to a simmer, cover, and cook for about 1 hour or until the chicken is cooked through.  Remove from the heat and strain through a fine sieve, separately reserving the chicken and cooking liquid.  Set aside to cool.

While the chicken is cooking, make the pastry.  Divide the dough into two equal pieces, wrap each piece in plastic film and refrigerate for at least 30 minutes to chill before rolling.

When cool, remove and discard the chicken skin.  Pull the meat from the bones and, if necessary, cut it into bite-sized pieces.  Place the meat in a heatproof bowl and discard the bones.  Set the meat aside.

Preheat the oven to 450ºF.

Pour 3 cups of the reserved cooking liquid into a large saucepan.  Place over medium-high heat and bring to a boil.  Add the carrots, potatoes, and onion and again bring to a boil.  Season with salt and pepper to taste, lower the heat, and simmer for about 12 minutes or just until the vegetables are barely cooked.  Remove from the heat and stir in the peas.  Strain the vegetables, separately reserving the vegetables and the liquid.

Place the chicken fat or butter in a medium saucepan over medium heat.  When melted, stir in the flour.  When blended, whisk in 2 cups of the hot broth, cooking for about 5 minutes or until the broth has thickened.  Pour the thickened gravy over the chicken meat.  Add the vegetables, gently folding the mixture together.  If the mixture seems too thick, fold in some of the remaining unthickened cooking liquid.

Remove the dough from the refrigerator.  Unwrap and, working with one piece at a time, roll the dough out as directed in my NOTE.  Fit one piece into a 10-inch pie plate and prick the bottom with the tines of a fork.

Pour the mixture into the prepared pie plate.  Fold the remaining top crust in half over the rolling pin, lift, and place over the filling.  Unfold to cover the filling and attach to the bottom crust by pressing the excess dough from the edge of the top and bottom crust together with your fingertips.  Fold the pressed dough edge up and inward, making a rim around the edge of the pie.  Starting at the edge opposite you, pinch the dough between your thumb and index finger around the edge of the pie at about ¾ inch intervals, forming a fluted design.  (The pie may be made up to this point and stored, well-wrapped and frozen, for up to 3 months).

Place the pie on a baking sheet in the preheated oven and bake for 15 minutes.  Lower the heat to 350ºF for an additional 20 minutes or until the crust is golden and the filling is almost bubbling out.

blog_PotPie_IMG_7275

Nana’s Flaky Pie Pastry

Enough dough for one double-crust 10-inch pie

            2½ cups all-purpose flour, sifted

            ¼ teaspoon salt

            Pinch sugar

            ¾ cup plus 1 tablespoon vegetable shortening, chilled

            ½ cup unsalted butter, cut into cubes and chilled

            ½ cup ice water

Combine the flour, salt, and sugar in the bowl of a food processor fitted with the metal blade.  Process to aerate and blend.

Add the shortening and butter and, using quick on and off turns, process just until crumbly.  With the motor running, add the water and process just until the dough begins to ball.  Scrape the dough from the processor bowl and divide it into two equal pieces.   The dough may also be frozen; thaw before using.

NOTE:  My mother never used a food processor to make her dough but I think it makes great pastry, particularly because the processor allows you to make quick and easy work of the job without handling the dough too much.  However, if you over-process, the heat created from the speed of the machine will toughen the dough.

Some pastry recipes give an approximate measurement for the water, but that always scares me.  How do you tell when enough is enough if you’re not a seasoned cook?  Most approximates are based on flavor so it really becomes a matter of taste but, with pastry making it is all up to the kitchen witch.  Rainy days, humid days, hot days, warm kitchen, glutenous flour – all of these play in how much water will be enough water to create a dough that just holds together and does not toughen.  I’ve found that the ½ cup of water is nearly always the correct amount.  Add the water slowly and watch carefully.  The incorporation moves much quicker with the food processor than it does when making dough by hand.

If you have never made pastry before, the rolling out is usually the most frightening task.  I have found that Wondra flour is terrific for flouring the work surface and the rolling pin as it only adds a light coating of flour to the dough.  Then, don’t panic; use a light hand, pushing the dough out from the center, lightly coating it and the rolling pin with Wondra if it seems to hang onto the rolling pin.  Lift the pin gently as you near the edge of the pastry to prevent breakage.  When the desired size is reached, lift the pastry by gently folding it in half over the rolling pin and slip it, still folded, into the pie pan.  Carefully unfold it to cover the bottom of the pie pan and remove the rolling pin.  Do not stretch the dough or it will shrink when baked.  If the pastry tears, not to worry, just gently pinch it back together.  Smooth the pastry down into the pan with quick pressing movements.

A further note:  If you can find an excellent quality lard and you aren’t concerned about fat in your diet, use it in place of the vegetable shortening and butter when making a savory pie.  It adds a wonderful meaty flavor.

From my son Chris:  Longing for home on a chilly, foggy San Francisco afternoon, I decided to make a chicken pie.  I was feeling a bit challenged as I wasn’t sure that I could live up to my pot pie heritage.  Nana, mom’s mom, made the flakiest pie crust you have ever tasted and I had spent my teenage years living off of the acclaimed chicken pies that mom made at her bakery.  I called mom and got the basic recipe, did my shopping, and announced to Canada that we were going to have a MooMoo dinner.  I was worried that I had overestimated my skill but forged ahead.  I was aiming for Nana’s flaky crust and a pie that could be cut into nice even pieces with just a calm oozing of gravy.  But although the finished pie looked terrific, the crust wasn’t as flaky as I had hoped and the filling ran all over the place once I cut into it.  Didn’t matter – Canada loved it and so did I.

Determined to master the craft, we added chicken pie to our favorite menu list.  After a good many tries, I like to think that mine is now equal to Nana’s.  I always use organic vegetables, but conventional can easily be substituted.
IMG-4150

Read Full Post »

sauerkraut_5172


Makes 1 quart or as much as you like

Fermented foods seem to be headed into becoming the next big culinary trend.  This is truly a case of everything old is new again as fermenting was one of the earliest methods of food preservation.  For years, once fall comes I have made sauerkraut as one of Steve’s favorite cold weather dishes is pork roast braised in white wine with sauerkraut, onions, and potatoes.  Sauerkraut is easy to make and keeps almost forever.  So, if you haven’t experienced fermenting in your kitchen here is an easy recipe to get started.  Later, I’ll give you the recipe for the braised pork.
You can use the sauerkraut at any point in the fermentation process.  Early in the process it will be more cabbage-like and crunchy; later it will be softer and have a stronger, more sour flavored. To add different flavor, add caraway, dill, or mustard seeds or chopped fresh dill to the fermenting mix.
Cabbage ferments very quickly at room temperature (about 70°F) and is usually ready to eat in a week.  You can also refrigerate it from the start, but fermentation will occur very slowly; however, the end result will be crisper.  If kept at a temperature over 80°F, it will quickly turn dark brown and spoil.  If this occurs, discard the sauerkraut and start again.

2 ½ pounds cabbage (preferably organic), cored with any wilted or damaged outer leaves removed
3 teaspoons sea salt

Shred the cabbage into coarse threads using either a food processor fitted with the shredding blade, the large holes of a hand-held box grater, a mandoline, or by hand with a large, sharp chef’s knife.  To ensure correct fermentation I recommend that you weigh the cabbage after you have removed the core and any wilted or damaged outer leaves.
Place the cabbage in a large bowl and sprinkle the salt over the top.  Using your hands, begin massaging the salt into the cabbage working until the cabbage exudes a substantial amount of liquid.  The time required will be dependent upon the freshness of the cabbage and the strength of your massage and can range from a couple of minutes to 30 or so.
Pack the cabbage and the liquid into a clean, sterilized container, such as a 1-quart glass canning jar with a clean, unused lid.  Using your fingertips, a smaller jar or glass that will fit down into the larger jar, or a potato masher, press down as firmly as you can to allow the liquid to rise up and cover the shredded cabbage.  You should leave about 1- to 2-inches of space between the cabbage and the top of the jar to give the cabbage space to expand as it ferments.  If the mixture has not created enough liquid to cover add enough cool distilled water to completely cover.
Place a bit of cool water into a small resealable plastic bag, pushing to eliminate all air.  You need just enough water to create a weight to keep the cabbage under the liquid.  Seal the bag and place it on top of the cabbage, pushing down to insure that the water-bag is serving as a weight.  Place the lid on the container and seal tightly.
Set aside in a cool, dark spot for 5 days.  Check the fermentation process daily to make sure that the cabbage has remained covered with liquid.  If not, add distilled water to cover.
After 2 days, begin tasting the sauerkraut.   Remove the water-bag and set it aside.  Remove and discard any scum or mold that has formed, noting that it is not harmful, just unappetizing.   Using a clean fork, poke around in the jar and pull out a small taste.  This allows you to follow the fermentation process and determine when the cabbage has reached the point that is most desirable to your taste.  Just be sure to push the sauerkraut back down into the liquid, place the water-bag on top to press it down, tightly seal, and set aside as before.
Depending upon the temperature in its resting place, after one week the sauerkraut should be a bit bubbly and have a tart, sour aroma.  Whenever the sauerkraut has reached the flavor and texture you desire, transfer the jar to the refrigerator to impede the fermentation process.  The kraut will continue to ferment, but at a much slower pace.

Read Full Post »

Chanterelle_4546


Nobody loves mushrooms more than my son, Mickey.  He would eat them daily and the more obscure and expensive they are the more he likes them.  His usually are part of a rich sauce to accompany venison, or lamb, or lobster and he would never think of “wasting” them in pasta.  I, however, think they make a perfect mating with cheese and noodles so this is one of the ways I find to use beautiful chanterelles.  I find that they absorb the fattiness of the butter and cheese which only enhances their delicate, nutty flavor.

1 pound dried malfalda pasta or other noodles with a rippled or ridged edge
2 tablespoons unsalted butter
1 tablespoon extra virgin olive oil
1 shallot, peeled and minced
½ pound chanterelle mushrooms, cleaned and cut in half, lengthwise, if very large
1 teaspoon fresh thyme leaves
Salt and pepper
1 cup fresh ricotta cheese
¼ cup chopped parsley
¼ cup grated Parmesan cheese
Cracked black pepper for garnish

Place the pasta in a large pot of heavily-salted boiling water set over high heat.  
Return the water to the boil and boil according to package directions until al dente.  Remove from the heat and drain well, reserving about ½ cup of the cooking water.
While the pasta is cooking, combine the butter and olive oil in a large saucepan over medium heat.  Add the shallot and cook, stirring frequently, for about 2 minutes or just until softened.  Add the chanterelles and thyme and season with salt and pepper to taste.  Cook, stirring frequently, for about 5 minutes or just until the mushrooms are tender.  Remove from the heat.
When the pasta has cooked, add the drained pasta to the mushroom mixture, tossing to blend well.  Add the ricotta and parsley and again toss to coat.  Add a bit of the reserved pasta cooking water if necessary to “loosen” the sauce.  Taste and, if necessary, add salt and pepper.
Pour the pasta into a large pasta serving bowl.  Sprinkle with parmesan cheese and a bit of cracked black pepper and serve.


Chanterelle_4513

Read Full Post »

Meatballs_IMG_0345


March-April must be my meatball month. I just looked at past posts and found that I had talked about meatballs (and spaghetti) on March 11, 2011. Here I am talking about meatballs once again. You can find my recipe in that post, but thought it worth a reminder. Since that March I have been making meatballs in batches and freezing them. Since I always have my marinara sauce on hand (see July 13, 2010 for that recipe) at the end of a long day, I can reach into the freezer and in just a few minutes put together a pot of meatballs in sauce to toss into a bowl of spaghetti. Try it, you’ll like it.

Here are the links to the Meatball and Marinara recipes:

http://notesfromjudieskitchen.com/2011/03/11/who-doesn%E2%80%99t-love-spaghetti-and-meatballs/

http://notesfromjudieskitchen.com/2010/07/13/simple-marinara-sauce/

Read Full Post »

Meatloaf.dinner.IMG_0127
I’ve always loved meatloaf – almost any kind – even that grey diner variety can pique my interest.  It isn’t a family favorite so I don’t make it as often as I would like and when I do I have to doctor it up a bit to bring everyone to table.  This can mean that I look in the fridge to see what needs to be used yesterday and add it to the mix.  The other day that meant a container of cherry tomatoes and a sack of button mushrooms.  However, the thing about meatloaf is that it can be almost anything you want it to be so I will give you my mom’s old fashioned recipe – the one that I grew up on.  But, you can use beef, chicken, turkey, pork, lamb or any combination thereof to create an easy pop in the oven dinner – I always serve mine with baked potatoes and salad so dinner comes to the table 1-2-3.

1 ½ pounds lean ground beef
½ pound ground pork
1 medium onion, minced
½ cup diced canned tomatoes (my mom used those she had canned)
1 teaspoon chopped parsley (mom used dried)
1 teaspoon Worcestershire sauce
1 cup fine breadcrumbs
1 large egg
¼ cup milk
Salt and pepper to taste

Preheat the oven to 350ºF.
Combine the beef and pork in a large mixing bowl.  Stir in the onion, tomatoes, parsley, and Worcestershire.  Add the breadcrumbs along with the egg, milk, and salt and pepper, and,  using your hands, squish to thoroughly combine.
Form the mix into a firm loaf about 4-inches wide by 8-inches long.  When forming it into a loaf, you can also place 3 hard boiled eggs down the interior center.
Now, here’s where you can make some changes.  You can:
Cover the top with strips of bacon.
Make a sauce that can serve as gravy by combining 1½ cups tomato puree with ½ cup beef  broth (or stock if you have it) and ¼ cup minced onion OR 1½ cups beef broth with 2 tablespoons tomato paste, ½ cup chopped mushrooms, and 2 tablespoons minced onion.
Now, mind you, these are mom’s 1940s instructions – you can do whatever you want to fancy it all up.  When I want mom, I mix some broth with catsup and add whatever is on hand to spice it up a bit.  This is old-fashioned home-cooking after all!
Place it in the oven and bake for about 1 hour or until nicely browned and cooked through and, if you’ve made it, a slightly thickened tomatoey gravy has formed.

Meatloaf.dinner.IMG_0132

Read Full Post »

20140112.Mom's.Sunday.Breakfast.IMG_0115


It’s odd that when I think of my mom I don’t think of her as the “Nana” she was at the end of her life, but as a vital, aggressive, and, in her own way, nurturing “Mom” of my childhood.  As I was making a waffle treat for our breakfast this cold January morning I was suddenly overtaken by nostalgia – partly because the Christmas holidays were my mom’s favorite time of the year and it was during this period that she taught me so much about baking and sharing. And partly because I still make the waffle recipe she taught me.  And partly because I have the same “sweet tooth” that she had and love a waffle oozing with maple syrup.   But mostly it is at this time of the year that I deeply miss her by my side in the kitchen.

Just when a waffle came out of the waffle iron I said to myself “I’m going to make one for mom” and so I fried up 2 eggs and placed them on top of the waffle and then drizzled it with maple syrup…..just as she liked it…..and said “Here’s to you, you are missed.”

P.S.  A version of the waffle recipe can be found in the below link entitled “Waffles for Dinner?” from January 2011.

http://notesfromjudieskitchen.com/2011/01/28/waffles-for-dinner/

Read Full Post »

potato_2220

            Although I hadn’t eaten a potato croquette in years nor had I made one either, I decided to use some leftover mashed potatoes to create some crispy tater tots to accompany some steaks I was cooking up.  Many years ago there was a small Italian restaurant, Capri, in Manhattan’s theater district that served extraordinary croquettes – usually with a beautiful veal chop.  Theirs were so light and delicate that they seemed impossible to replicate at home so I didn’t even try.  They only came back to my sensory memory when I bit into my version.  Not fluffy, not terribly light, and certainly not delicate.  But, they tasted pretty good.  Now that they are back on the menu I’ll try to refine my recipe – I promised Steve that I’ll get to light and delicate.

Here’s what I did:

I had about 2½ cups of cold mashed potatoes to which I added 2 large eggs, ¾ cup of freshly grated parmesan cheese, and 2 tablespoons of flour.  I beat the mix until very well combined and then seasoned with salt and pepper.  I whisked 2 eggs with a bit of milk in one shallow bowl, put about 3 cups of lightly salted bread crumbs in another, and then Wondra flour in a third.  I formed the potato mixture into logs – they were much too big I realized – and then dipped the logs into the flour, then the egg mixture, and finally into the breadcrumbs.  I fried them in olive oil and dusted them with sea salt at the finish.  If I’d used freshly made dry potatoes that I’d pushed through a food mill, formed the mix into smaller logs, and fried them a little bit less, I think they would have been the light and delicate croquettes I remembered.  I’ll ace it next time.

Read Full Post »

AFC_cover

Wonderful News!  Coming this fall from Welcome Books is An American Family Cooks, my dream book, featuring recipes and tales from my family of cooks.  My sons, Mickey and Chris, feature prominently with wine suggestions by Chris a special treat.  My grandchildren will also be found among the pages as will paintings from Steve Kolyer.  We will keep you posted on our activities as the October publishing date gets close.

Read Full Post »