Feeds:
Posts
Comments

Archive for the ‘Chefs’ Category

This recipe takes quite a bit of prep work as you neatly dice all the vegetables but the end result is well-worth the effort.  It is one of my favorite soups to make when fresh cannellini beans come to the green market.  This usually happens in the late summer or early fall.  I particularly enjoy the zen of sitting and shelling the beans.  If you have a rind of Parmesan cheese on hand, throw it in the pot.  It will add a lovely richness to the broth.

A version of this recipe will be found in my new book, The Mighty Bean, which will be published in February 2021.

Serves 6

¼ cup unsalted butter

2 tablespoons olive oil

1 cup diced onions

1 cup diced leeks

2 tablespoons minced flat leaf parsley

2 cups fresh cannellini beans

6 cups low-sodium vegetable broth

1 cup diced potatoes

1 cup diced carrots

1 cup diced celery

1 cup diced zucchini or yellow summer squash

1 cup diced green beans or yellow wax beans

1 cup fresh peas

1 cup chopped Savoy cabbage

2 cups diced Italian plum tomatoes with their juice

Salt and pepper

Extra virgin olive oil for serving, optional

Freshly grated Parmesan cheese for serving, optional

Combine butter and oil in a large soup pot over medium heat.  When hot, add the onions, leeks and parsley.  Lower the heat and cook, stirring frequently, for about 5 minutes or just until the aromatics begin to soften.

Stir in the cannellini beans and add 2 cups of the broth.  Cook for an additional 15 minutes.

Begin adding all the vegetables except the tomatoes, one at a time, and cooking each one for 3 minutes before adding the next one.  They should be added as they are listed in the ingredient list as this allows for the proper cooking time for each one.  

When all the vegetables have been added, stir in the tomatoes and remaining vegetable broth.  Season with salt and pepper, raise the heat and bring to a boil.

Immediately lower the heat to a bare simmer.  Simmer for about 30 minutes or until the soup is very thick.

Remove from the heat and serve with a sprinkle of grated Parmesan cheese and a drizzle of extra virgin olive oil, if desired.


Read Full Post »

OLYMPUS DIGITAL CAMERA

Eggplant Parm


Visiting our dear friends at their lake house I was designated the night’s cook.  I checked the fridge and found a couple of eggplant more than ready to be used.  At first I was just going to slice, bread and fry as my mom used to do – she insisted that fried eggplant tasted like fried oysters and who were we to argue – but then I remembered that I had brought a couple of jars of passata – that wonderfully rich Italian condensed tomato sauce so decided to look for enough other ingredients to make a version of eggplant parm.  However it was so hot, I didn’t want to turn the oven on so I thought why not give the grill a try……the eggplant would already to cooked and I would just need the heat to melted the cheese and give the flavors time to unite and give that delicious mixture of unctuous vegetable, rich sauce and melting cheese time to dance.

So, that’s what I did – I fried the eggplant, made a quick tomato sauce with the passata and fresh garlic and basil from the garden and sliced up a big hunk of mozzarella from the farmers market that I found in the cheese drawer of their well-stocked fridge.  Even found some pre-ground Parmesan to add that special sharp salty taste that gives that extra oomph to Italian dishes.  Put the mix together, heated up the grill, pulled the lid down and in less than a half flour we had a lovely almost Italian dinner on the deck.  Was my dish a classic – not really – but it sure was good.

Depending upon the amount of eggplant slices you have you can make a single layer, a double layer or even a triple layer of eggplant, cheese and sauce – always ending with a coating of sauce and a goodly amount of cheese to melt over it all.

You will also note that I don’t salt eggplant as many do – I’ve never found it necessary.  

By the way, just simply fried eggplant is a great easy dinner with the arugula on top and a bit of bread and cheese on the side.  And, you know what, the eggplant does kinda taste like friend oysters!

Just Plain Fried Eggplant

Serves 4 to 6 

2 large eggs

¼ cup milk

3 cups breadcrumbs (plain or seasoned, depending upon your preference)

½ cup Wondra flour

Sea salt and freshly ground pepper 

2 medium eggplants, trimmed and cut, crosswise, into slices about ⅜-inch thick 

About ½ cup olive oil for frying

Lemon quarters for drizzling

Preheat the oven to 350ºF.  


Combine the eggs and milk in a shallow dish, whisking to blend well.

Combine the breadcrumbs and flour in another shallow dish.  Season with salt and pepper to taste and stir to blend.

Working with one eggplant slice at a time, dip it into the egg mixture, allowing excess to drip off.  Then, dip it into the bread crumb mixture.  If you prefer a heavy coating, again dip into the egg and bread crumb mixture.  

Heat ¼ cup of the olive oil in a large frying pan over medium-high heat.  When very hot, but not smoking, begin adding the coated eggplant, without crowding the pan.  Fry, turning once, for about 3 to 4 minutes or until crisp and golden brown.  Transfer to a double layer of paper towel to drain.  If the oil gets too dark and filled with bits of the cooked coating, pour it out, wipe the pan clean with paper towel, and start again with fresh oil.

When all of the eggplant has been fried, transfer to a serving platter.  If you want to fancy it up, place a few handfuls of arugula in a mixing bowl and drizzle with olive oil and the juice of ½ lemon.  Season with salt and pepper and mound on top of the eggplant. Serve with lemon quarters for drizzling on the eggplant.

If you want to make Eggplant Parm, generously coat a baking dish with olive oil.  Coat the bottom of the dish with you favorite marinara sauce, followed by a layer of eggplant and then a thin layer of mozzarella cheese and continue making layers until you’ve made as many layers as you wish, ending with a coating of sauce and a layer of mozzarella.  You can sprinkle in Parmesan at any point including on the top of the final layer of mozzarella. Bake at 350°F for about 30 minutes or until hot, bubbling and the top layer of cheese is beginning to brown.

OLYMPUS DIGITAL CAMERA

Read Full Post »

OLYMPUS DIGITAL CAMERA

The Mighty Bean

We are a family of bean lovers!  I wrote my first bean cookbook almost 30 years ago and I have a new one coming out this winter – The Mighty Bean published by Countryman Press. They both are filled with recipes we love. Refried beans are right up there with the top 5 favorites even though they are not as heart healthy as we should be eating – but you really do need that bacon fat for the depth of flavor good refried beans have.  This is about as close as I come to making a traditional Mexican refried bean.  I like to make a batch and keep it on hand for making a quick burrito, enchilada or tostada.  If you keep a can of Hatch Enchilada Sauce (which I find to be excellent) and some tortillas on hand you can have a tasty Mexican-inspired dish on the table in minutes!

Refried Beans

Serves 6

1 pound dried pinto beans, soaked (see page 00)

1 cup diced onions

¼ cup chopped cilantro

1 tablespoon minced garlic

1 teaspoon fresh oregano leaves – Mexican oregano is great if you can find it

Salt and pepper

1 cup bacon fat

Place the beans in a large saucepan with cold water to cover by 2-inches.  Add the onions, cilantro, garlic and oregano and place over high heat.  Bring to a boil; then, lower the heat and cook at a gentle simmer for about 2 hours or until the beans are very soft.  The beans should still be liquidy – if not, add water throughout the cooking process.  When the beans have softened, season with salt and pepper.

Remove from the heat and drain well, reserving the liquid.  Place the beans in the bowl of a food processor fitted with the metal blade and, with the motor running, add the cooking liquid a bit at a time.  The beans should be a bit rough – do not puree.

Place ½ cup of the bacon fat in a large frying pan over medium-high heat.  Add the beans and cook, stirring constantly, for about 15 minutes incorporating the fat into the beans as you stir.  Cook until the beans are a bit dry.

Remove the beans from the heat and let cool.

Then, return to the heat and, using the remaining ½ cup of bacon fat, repeat the frying process.  You may not need to use all of the fat.  

Serve as a side dish or as a topping for tostadas or as a filling for burritos and/or enchiladas.

Store, covered and refrigerated, for up to 1 week.  May be frozen.  Reheat before using.

NOTE:  When frying the beans for the first go-round, you may add finely diced onions, tomatoes and/or minced garlic to the mix.

You can also incorporate 2 cups of shredded queso blanco or Monterey jack cheese just before serving.

Read Full Post »

OLYMPUS DIGITAL CAMERA

C & C Provisions

I guess there is nothing more irritating than a mother crowing about the accomplishments of her children but, if you will indulge me for a moment, I think I really do have a legitimate “crow”.  My son, Chris, has started a new business that is still in its infancy but we envision it becoming a very substantial one.  It is called C & C Provisions based in Corte Madera, California.  He doesn’t have a website yet – it is in the works.

He began a few years ago making a delicious country pâté for himself and slowly people began asking for him to share.  He realized he had a passion as he has moved on to curing his own meats, building a curing refrigerator and expanding his whole line of charcuterie.  He now makes coppa (many different cures), pancetta, bresaola, guanciale, bacon, lonza, hot and sweet Italian sausage, Willa’s breakfast sausage (named after his little daughter who loves it), chicken liver mousse, pork and duck rillettes.  He has a culatello in the works and is moving up to prosciutto.  Along with these extraordinary meats, he is pickling vegetables, curing fish, making cheese and once a week offering a family meal which is usually a one pot dish that will feed a hungry family.  All while he still is in the business of selling wine…..

From time to time I will add updates as we watch him grow and expand and settle into being a full-time charcutier.  And, I hope you will forgive my crowing about his accomplishments – self taught and perfection!

Read Full Post »

Beets with Greens_DSC_6222

We’ve been visiting friends who have their first garden growing on their deck in large planters.  We have been watching the beets grow and were beginning to see the glorious red globes peeking out of the earth when we left.  Beets have always been a favorite vegetable for me and now they seem to hold that same allure with my grandchildren – except the littlest one who hasn’t yet decided that vegetables are part of the necessary food groups.

My mother loved to make Harvard Beets which was the only way I refused to eat them.  I called them slimy….  You never see them anymore and, as far as I am concerned, this is with good reason.  If you’re not familiar with them Harvard Beets are diced cooked beets cooked in a very sweet, slightly vinegary cornstarch-thickened sauce.  Why any cook ever decided to add sugar to an already sugary beet is a mystery to me.

I am so delighted that beets are beginning to appear at the green market.  They will be on our table throughout the summer and early fall.  I prefer to bake them in their skins, wrapped in foil.  When done, I push off the skins, slice them and either pickle them or give them a quick sauté in butter, season with salt and pepper and toss in some fresh dill, parsley or tarragon.  So, yummy.

Read Full Post »

OLYMPUS DIGITAL CAMERA

I’ve been thinking a lot about avocados —- well, you know, it is a time of isolation when our thoughts can run amok!!!!  Why avocados?  I don’t really know but I would guess it is because during this extraordinary time people have taken to cooking and blogging and social mediaing about their favorite or, often, most challenging dishes.  Among the top 2 have been avocado toasts and sourdough bread.  I have never done an avocado book but I have done a couple of classic bread books – The French Culinary Institute’s Fundamentals of Bread Baking and Master Baker Lionel Vatinet’s A Passion for Bread and you would think that I would have, by now, mastered not only sourdough bread but tons of others.  Instead I just make my own traditional white batter bread that my mom and probably my grandmother made.  So, that leaves avocados.

Even when I was a wee one, avocados were a favorite.  Before I had teeth, my mom would slather a saltine with mashed avocado as a treat.  I’m told I would lick off the avocado and hand the cracker back for more until the cracker folded….  I still love avocado slather on a saltine.  However, when our Aussie friends introduced us to their national breakfast dish, avocado toast, I took to it like that proverbial duck to water.  There are so many versions that it is hard to keep an up-to-date list but my favorite remains any that combine avocado, tomato and/or olives.

Another favorite is individual nacho-like avocado chips.  All you need is a fresh tortilla chip (I lie, you can use bagged tortilla chips.), mashed, well-seasoned avocado, some cooked chicken or pork, grated cheese and some kind of zesty salsa/sauce to drizzle as you snack.  A perfect nosh with a chilled margarita!

A note on the latter – fresh tortilla chips are so so so so so much better than packaged chips.  And, easy to make.  Cut small corn tortillas into triangles or even break them into random pieces.  Season with a little oil and salt, tossing to coat.  You can add some ground cumin, cayenne or chili powder if you like.  Lay them out in a single layer on baking sheets and bake at 300°F, tossing and turning occasionally, until they are crisp and lightly colored.  They are addictive!

DSC_6650

Read Full Post »

blog_PotPie_IMG_7327

My mother made extraordinary pastry as did my father’s sister, Mary Frances.  Their skill intimidated me and, until I decided to make pot pies commercially, I never made pastry, I would always ask mom to make it for me.  So, when I decided to open my pie shop MOM in the 1970s, I had to spend many, many hours carefully watching her make her famous pastry.  She worked with me and my dear friend, Hu Pope, who would be making the pastry daily in the bakery, torturing us with her skill and our ineptitude.  Of course, the fact that she never measured anything and kept telling us that it was all in the feel didn’t help either.  We eventually got it, but I still believe that it was mainly the use of a big Hobart mixer and a commercial pie shell press which kept our hot hands from touching the dough that gave our acclaimed pastry the same flaky texture of her homemade dough.  However, the years in the bakery eliminated all intimidation and I began fearlessly tackling pastry making.  I usually do a fine job but I still miss my mom’s touch.  Since I made chicken pies every day for 10 years, I now generally leave their preparation to the kids, except for those chilly days when I miss my mom.

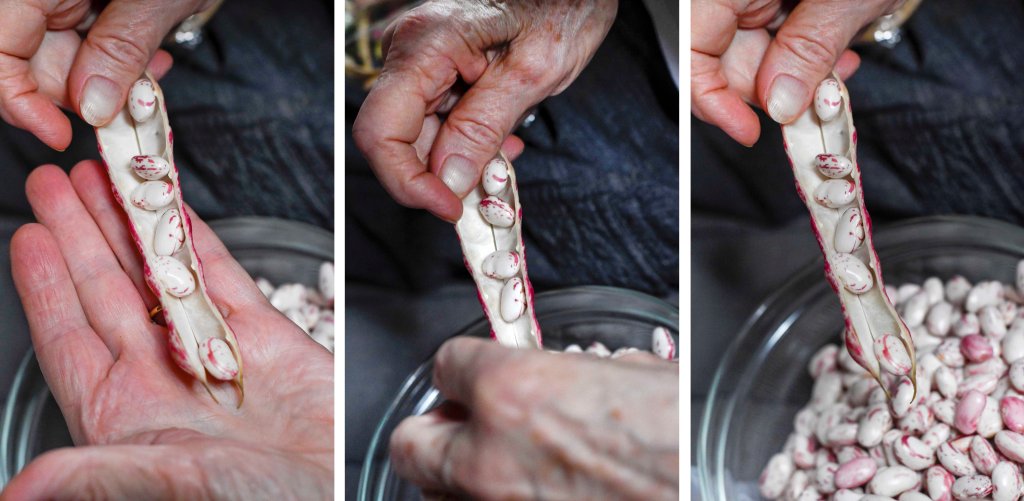
When I was a child, chicken pie was often made from leftover roast chicken and gravy.  It is one of those homey dishes that can be made in almost any way – the chicken can be dark and white meat, all white meat, chopped, shredded, cubed, or turkey; the vegetables can be cubed, diced, sliced (Chris’ method,) chunked; mushrooms added.  You get the picture.  This recipe is the basic – it’s up to you to make it your own.

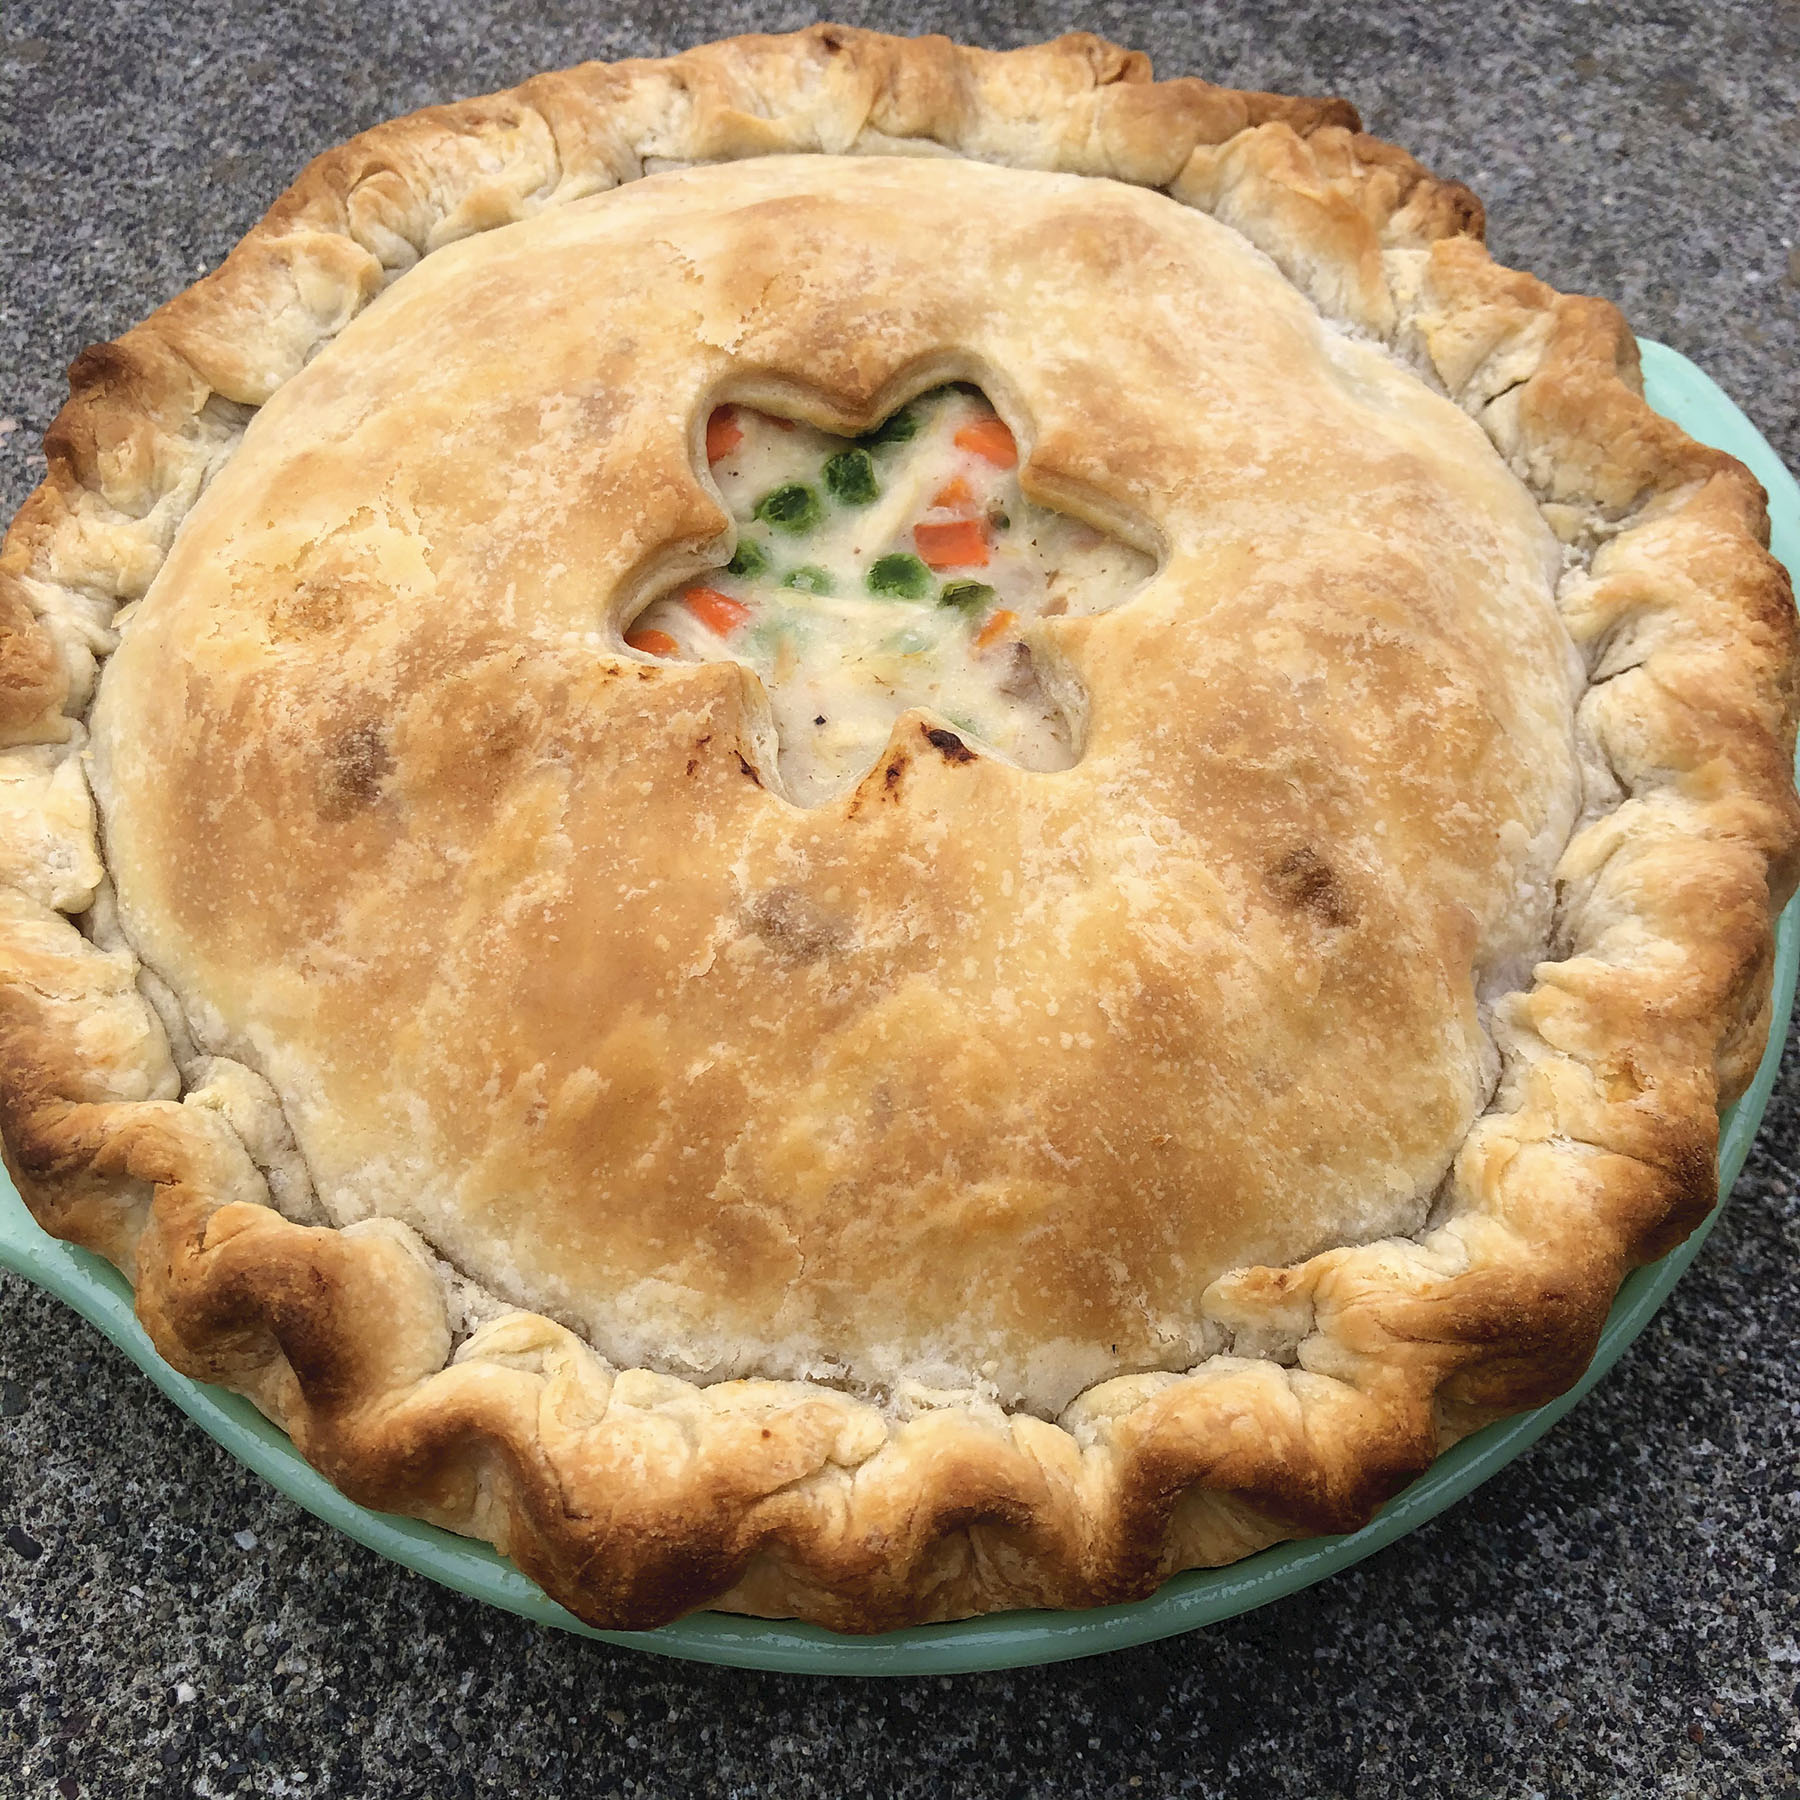
I share photos of my individual chicken pie.  I usually make these as an introduction to people dining with us for the first time.  I think they are homey, delicious, warming and do all the things you want to do to bring people to your table.  I also share a recent photo of one of Chris’s West Coast famous chicken pot pies.  How proud my mom would be of him.

blog_PotPie_IMG_7303


Serves 6 to 8

One 4 pound chicken, rinsed and cut into pieces (or 2 pounds boneless,

skinless chicken breasts cooked in about 3 cups canned, fat-free, low-

sodium chicken broth)

Coarse salt and freshly ground pepper to taste

Nana’s Flaky Pie Crust (recipe follows)

4 organic carrots, well-washed, trimmed, and cubed

3 medium organic potatoes, well-washed and cubed

1 organic onion, peeled and diced

1 cup frozen petit peas, thawed

2½ tablespoons chicken fat or butter

2½ tablespoons sifted all-purpose flour

Place the chicken in a heavy saucepan, cover with cold water, and season with salt and pepper to taste.  Place over high heat and bring to a boil.  Lower the heat to a simmer, cover, and cook for about 1 hour or until the chicken is cooked through.  Remove from the heat and strain through a fine sieve, separately reserving the chicken and cooking liquid.  Set aside to cool.

While the chicken is cooking, make the pastry.  Divide the dough into two equal pieces, wrap each piece in plastic film and refrigerate for at least 30 minutes to chill before rolling.

When cool, remove and discard the chicken skin.  Pull the meat from the bones and, if necessary, cut it into bite-sized pieces.  Place the meat in a heatproof bowl and discard the bones.  Set the meat aside.

Preheat the oven to 450ºF.

Pour 3 cups of the reserved cooking liquid into a large saucepan.  Place over medium-high heat and bring to a boil.  Add the carrots, potatoes, and onion and again bring to a boil.  Season with salt and pepper to taste, lower the heat, and simmer for about 12 minutes or just until the vegetables are barely cooked.  Remove from the heat and stir in the peas.  Strain the vegetables, separately reserving the vegetables and the liquid.

Place the chicken fat or butter in a medium saucepan over medium heat.  When melted, stir in the flour.  When blended, whisk in 2 cups of the hot broth, cooking for about 5 minutes or until the broth has thickened.  Pour the thickened gravy over the chicken meat.  Add the vegetables, gently folding the mixture together.  If the mixture seems too thick, fold in some of the remaining unthickened cooking liquid.

Remove the dough from the refrigerator.  Unwrap and, working with one piece at a time, roll the dough out as directed in my NOTE.  Fit one piece into a 10-inch pie plate and prick the bottom with the tines of a fork.

Pour the mixture into the prepared pie plate.  Fold the remaining top crust in half over the rolling pin, lift, and place over the filling.  Unfold to cover the filling and attach to the bottom crust by pressing the excess dough from the edge of the top and bottom crust together with your fingertips.  Fold the pressed dough edge up and inward, making a rim around the edge of the pie.  Starting at the edge opposite you, pinch the dough between your thumb and index finger around the edge of the pie at about ¾ inch intervals, forming a fluted design.  (The pie may be made up to this point and stored, well-wrapped and frozen, for up to 3 months).

Place the pie on a baking sheet in the preheated oven and bake for 15 minutes.  Lower the heat to 350ºF for an additional 20 minutes or until the crust is golden and the filling is almost bubbling out.

blog_PotPie_IMG_7275

Nana’s Flaky Pie Pastry

Enough dough for one double-crust 10-inch pie

            2½ cups all-purpose flour, sifted

            ¼ teaspoon salt

            Pinch sugar

            ¾ cup plus 1 tablespoon vegetable shortening, chilled

            ½ cup unsalted butter, cut into cubes and chilled

            ½ cup ice water

Combine the flour, salt, and sugar in the bowl of a food processor fitted with the metal blade.  Process to aerate and blend.

Add the shortening and butter and, using quick on and off turns, process just until crumbly.  With the motor running, add the water and process just until the dough begins to ball.  Scrape the dough from the processor bowl and divide it into two equal pieces.   The dough may also be frozen; thaw before using.

NOTE:  My mother never used a food processor to make her dough but I think it makes great pastry, particularly because the processor allows you to make quick and easy work of the job without handling the dough too much.  However, if you over-process, the heat created from the speed of the machine will toughen the dough.

Some pastry recipes give an approximate measurement for the water, but that always scares me.  How do you tell when enough is enough if you’re not a seasoned cook?  Most approximates are based on flavor so it really becomes a matter of taste but, with pastry making it is all up to the kitchen witch.  Rainy days, humid days, hot days, warm kitchen, glutenous flour – all of these play in how much water will be enough water to create a dough that just holds together and does not toughen.  I’ve found that the ½ cup of water is nearly always the correct amount.  Add the water slowly and watch carefully.  The incorporation moves much quicker with the food processor than it does when making dough by hand.

If you have never made pastry before, the rolling out is usually the most frightening task.  I have found that Wondra flour is terrific for flouring the work surface and the rolling pin as it only adds a light coating of flour to the dough.  Then, don’t panic; use a light hand, pushing the dough out from the center, lightly coating it and the rolling pin with Wondra if it seems to hang onto the rolling pin.  Lift the pin gently as you near the edge of the pastry to prevent breakage.  When the desired size is reached, lift the pastry by gently folding it in half over the rolling pin and slip it, still folded, into the pie pan.  Carefully unfold it to cover the bottom of the pie pan and remove the rolling pin.  Do not stretch the dough or it will shrink when baked.  If the pastry tears, not to worry, just gently pinch it back together.  Smooth the pastry down into the pan with quick pressing movements.

A further note:  If you can find an excellent quality lard and you aren’t concerned about fat in your diet, use it in place of the vegetable shortening and butter when making a savory pie.  It adds a wonderful meaty flavor.

From my son Chris:  Longing for home on a chilly, foggy San Francisco afternoon, I decided to make a chicken pie.  I was feeling a bit challenged as I wasn’t sure that I could live up to my pot pie heritage.  Nana, mom’s mom, made the flakiest pie crust you have ever tasted and I had spent my teenage years living off of the acclaimed chicken pies that mom made at her bakery.  I called mom and got the basic recipe, did my shopping, and announced to Canada that we were going to have a MooMoo dinner.  I was worried that I had overestimated my skill but forged ahead.  I was aiming for Nana’s flaky crust and a pie that could be cut into nice even pieces with just a calm oozing of gravy.  But although the finished pie looked terrific, the crust wasn’t as flaky as I had hoped and the filling ran all over the place once I cut into it.  Didn’t matter – Canada loved it and so did I.

Determined to master the craft, we added chicken pie to our favorite menu list.  After a good many tries, I like to think that mine is now equal to Nana’s.  I always use organic vegetables, but conventional can easily be substituted.

IMG-4150

Read Full Post »

OLYMPUS DIGITAL CAMERA

It’s that time of year — asparagus is filling the green markets and being plucked from home gardens.  There is nothing as delicious to see than those bright green heads peeking up through the softening earth.  When I was a little one – there I go again talking about when I was —- my mom and aunt would take me in hand as they scouted the edges of irrigation ditches looking for the first spring crop.  I have absolutely no idea why asparagus grew along the ditches but if any of you readers do please tell me.  We would have asparagus every night until it got too warm and the asparagus disappeared.  It would also be canned and pickled.

When I use it in risotto, I like to add the trimmings to the stock to deepen the asparagus flavor.  And, if you don’t have stock or broth on hand, just add the trimmings to water and that will give you a flavorful stock.  If you have any on hand, a small dice of fennel also works to add some complexity to the final dish.

Serves 4

Approximately 4 cups hot chicken stock or low-sodium chicken

broth

3 tablespoons unsalted butter

¼ cup finely diced onion

Salt

1 cup Arborio rice

½ cup dry white wine

1 pound fresh asparagus, trimmed and cut, on the diagonal, into

thin pieces

1 tablespoon extra virgin olive oil

1 cup grated Parmesan cheese

Pepper

Place the chicken stock or broth in a large saucepan over medium heat.  If you have them, add the trimmings from the asparagus to the stock to add flavor.  Bring to a simmer; then, remove from the heat and keep warm.  

Place the butter in a heavy bottom saucepan over medium heat.  When melted, add the onion and season with salt.  Cook, stirring frequently, for about 3 minutes or just until the onion begins to soften.  Lower the heat, add the rice and cook, stirring, for about 5 minutes or until the rice is shiny and has absorbed some of the butter.

Return the stock to low heat.

Add the wine to the rice and cook, stirring constantly, for about 5 minutes or until the rice has absorbed the wine.  

Begin adding the hot stock, about ¼ cup at a time, and continue to cook, stirring constantly, as each ¼ cup is absorbed and the rice is creamy but, al dente.

Stir in the asparagus and olive oil and cook for an additional 4 minutes or until the asparagus is still crisp-tender.

Remove from the heat and stir in half of the cheese.  Cover and let stand for 3 minutes.

Uncover and pour into individual serving bowls.  Garnish with the remaining ½ cup of cheese and a sprinkle of pepper.

Serve immediately.  

Read Full Post »

OLYMPUS DIGITAL CAMERA

I know I disappeared once before and then promised to do better about keeping my blogging moving ahead.  Then, it just seemed as though there was so much information and so many recipes and food talk online that what I had to add didn’t seem necessary.  So, once again, I shut down.  However, through this past year or so, friends kept asking me to return to the blog.  When I would ask why, the general answers seemed to be about the same – your recipes are easy, your comments light and comforting to novice cooks and fun to read.  Even those great cooks told me that they enjoyed my banter as much as they enjoyed seeing what I was cooking and why I was cooking.  All that to say as the pandemic is raging across the world, I’m back.  And, I dearly hope, here to receive plenty of comments from all of you who take the time to read my ramblings.  It’s you who make this all worth doing.

Here is a “Welcome Back” photo from my dear husband, photographer Steve Pool.  You can visit his work on his website www.stevepool.net – his show this past October was a sold-out event.  It features Sausage Rolls, a specialty of my dear friend, Stuart Clarke, and was taken at my December DeGustibus at Macy’s Cooking School class

Read Full Post »

OLYMPUS DIGITAL CAMERA

If you follow my blog, you know that the photos on it are taken by my husband, Steve Pool.  After many, many years of prodding, we finally got him to put himself out into the internet world through a website which is www.stevepool.net.  I share one of his much-loved flower photos with an urge for you to visit his website.  He sells prints and should you desire, I think he might make cards from any of the photos on the website or from any photos on my blog that lend themselves to the card format.  We – his friends, family, and editors – love his work and I hope you will share it with others also.

Read Full Post »

Older Posts »